Raspberry Pi Cluster with k3s
Why build a Raspberry Pi cluster I hear you ask? Why Not! An RPI cluster is a very cost effective way of getting yourself a half decent ARM cluster for running something like Kubernetes on. This allows you to experiment with a whole bunch of micro-service architectures without invoking your expensive AWS account.
We will be running Rancher Lab’s k3s. In their own words k3s is
Lightweight Kubernetes. Easy to install, half the memory, all in a binary less than 100 MB.
Perfect for running a small DIY Kubernetes based cluster at home.
Components
Whats in this thing?
Well we need some Raspberry Pis. You will need a minimum of 2 Raspberry Pi 2B/3B/3B/4+ (ARMv7). You can’t use the first generation of Raspberry Pi or a Raspberry Pi Nano as these are not compatible with k3s due to their architecture. I have gone for the Raspberry Pi 3 Model B, mostly because I had some lying around.
If you don’t have any I would get the latest and greatest, the Raspberry Pi 4 B+ with 4GB Ram, if you can afford it.
I have chosen to go with 6 in my cluster, but you can do whatever you want.
Next, the micro SD card, you can use more or less anything. I went with the Samsung EVO Plus 32 GB microSD.
To avoid the awkwardness of setting up WiFi, not to mention it will be slow for k3s, you will want to get an ethernet switch. I chose the NETGEAR GS108 8-Port Gigabit Ethernet Network Switch as it has 8 ports, one more than I need.
To power all of the RPis I went with the Anker PowerPort 60 W 6-Port USB Charger, this provides all the power the RPis will need and will only use a single power socket.
Of course, all this needs some Micro USB or USB-C cables for power depending on your choice of Raspberry Pi and some Ethernet Cables, I went with flat ethernet cables as they are easier to manipulate.
To hold this all together we can use an enclosure like GeeekPi 6-Layers Raspberry Pi Cluster Case.
To keep it all together I zip tied the power pack to the top of the enclosure and it all sits on the top of the switch. You should end up with something like:

My Component list
- 6x Raspberry Pi 4 B+, 4GB RAM
- 6x Samsung EVO Plus 32 GB microSD
- 1x NETGEAR GS108 8-Port Gigabit Ethernet Network Switch
- 1x Anker PowerPort 60 W 6-Port USB Charger
- 6x USB cables
- 6x Ethernet Cables
- 1x GeeekPi 6-Layers Raspberry Pi Cluster Case
Flash the SD cards
With 6 to do this can take some time. We will use Raspberry Pi OS as the base image as the Raspberry Pi guys have gone to the effort of creating it for us.
-
Download Raspberry Pi OS - Lite
-
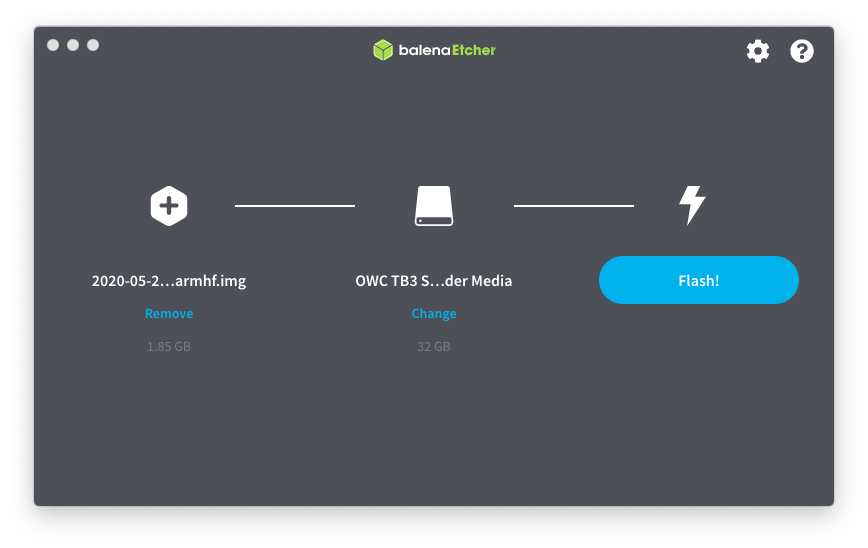
Flash your Micro SD cards with the software of your choice for your platform, I use Balena Etcher because it is easy.
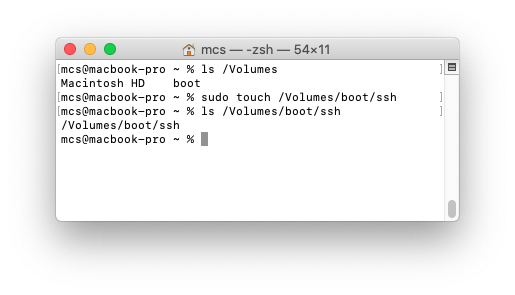
- Add an “ssh” file in to the boot partition to allow SSH access.
Boot it up
To make it easier I will boot up each Raspberry Pi individually. This just makes it easier to resolve their IP address so you know which Raspberry Pi is which. I will then perform the following setup steps:
Work out the IP address and reserve it on my router
The single Raspberry Pi you started should be resolvable at raspberrypi.local.
I use ping to resolve this to the IP address on my local network.
ping raspberrypi.local
# PING raspberrypi.local (192.168.86.39): 56 data bytes
# 64 bytes from 192.168.86.39: icmp_seq=0 ttl=64 time=1.326 ms
# ...
I am also taking the opportunity to reserve static IP addresses on my router for each Raspberry Pi.
This just makes it easier in the future.
I am using the range 192.168.86.100-105.
For the new IP address to be adopted I need to restart the device.
Now when I ping it I get the static IP address.
ping raspberrypi.local
# PING raspberrypi.local (192.168.86.100): 56 data bytes
# 64 bytes from 192.168.86.100: icmp_seq=0 ttl=64 time=1.237 ms
# ...
SSH in to the Raspberry Pi and perform initial setup
SSH in to the server as the pi user.
The password will be raspberry, don’t worry we will be changing this.
Once logged on run
sudo raspi-config
This will bring up the Configuration GUI. There are a few things we need to do here:
- Update the tool using option 8.
- Change the password so that the Raspberry Pi is secure. This is option 1 on the menu.
- Set a hostname so you don’t need to remember the IP addresses. This is option 2 then option N1. My cluster is going to be nicknamed apple so I am using apple1-6.
- Expand the filesystem to the entire SD card. This is option 7 then option A1.
- Change the GPU memory split (it doesn’t need that much for what we are doing). THis is option 7 then option A3. Set the memory to 16.
Choosing finish will reboot your Raspberry Pi and set the configuration.
Add your SSH key
Passwords are rubbish. We will be authenticating with our Raspberry Pis using SSH keys instead. If you don’t already have one they are easy to generate.
To check if you have one already try out
ls ~/.ssh/id_rsa.pub
If you don’t have an SSH key already you can use ssh-keygen to create your own.
Now copy the SSH key to the Raspberry Pi. I am using the new hostname here.
ssh-copy-id [email protected]
Now when you SSH on to the server you won’t be asked for a password. You will be authenticating using your SSH keys.
Make the kernel use features that are required for containers
By default the kernel is not configured to use some features that are required to run containers.
To turn them on we need to add some flags to the /boot/cmdline.txt file and restart the Raspberry Pi for the configuration to be applied.
sudo sh -c 'echo "cgroup_enable=cpuset cgroup_memory=1 cgroup_enable=memory" >> /boot/cmdline.txt'
sudo shutdown -r 0
Install k3s on the controller node
Now that you gave all of your Raspberry Pis setup with some sensible configuration it is time to start the k3s install.
We will be setting up our cluster with a single controller and as many nodes as you have spare Raspberry Pi boards for.
My k3s controller will be installed on apple1 with apple2-6 being configured as workers.
Rancher provides some helpful scripts for installing k3s. But if you don’t like the idea of downloading and running some arbitrary script from the internet Rancher do have some guides on how to do it iin other ways.
I am going to use the script so I can just run the following.
curl -sfL https://get.k3s.io | sh -
This script will:
- Install k3s as a service that will be automatically started at boot or if the process crashes.
- Install additional utilities such as
kubectl. - Write a kubeconfig file to
/etc/rancher/k3s/k3s.yaml.
We will be administering our k3s cluster with kubectl.
I am going to administer the cluster remotely from my Macbook.
To do this I need to install kubectl which I can do using Homebrew.
I also need to have some kubeconfig to tell kubectl where to find my k3s controller and give it permissions to access it.
The k3s install will have written the kubeconfig that I need to /etc/rancher/k3s/k3s.yaml.
Copy the configuration in that file to your local machine as ~/.kube/config.
You will need to replace any reference to localhost or 127.0.0.1 with the IP or hostname of your cluster controller.
Running kubectl cluster-info from my local machine will now give me the status of my single node Raspberry Pi cluster.
kubectl cluster-info
# Kubernetes master is running at https://apple1.local:6443
# CoreDNS is running at https://apple1.local:6443/api/v1/namespaces/kube-system/services/kube-dns:dns/proxy
# Metrics-server is running at https://apple1.local:6443/api/v1/namespaces/kube-system/services/https:metrics-server:/proxy

To further debug and diagnose cluster problems, use 'kubectl cluster-info dump'.
Install k3s on the worker nodes and join them to the cluster
This is just as simple as the cluster controller.
We only need a couple of extra variables before we can run the install script.
We need to set the K3S_URL and K3S_TOKEN.
The K3S_TOKEN can be retrieved from /var/lib/rancher/k3s/server/node-token on cluster controller.
The K3S_URL should be https://<cluster-controller-hostname>:6443, for me this is https://apple1:6443.
Once you have these values you can run the Rancher k3s install script with some extra parameters to start it as a worker.
curl -sfL https://get.k3s.io | K3S_URL=https://apple1:6443 K3S_TOKEN=<token> sh -
Once this has been done on all the nodes you should be able to see them all operating in your cluster by running kubectl get nodes.
For example, on my system I get:
kubectl get nodes
NAME     STATUS   ROLES    AGE     VERSION
apple1   Ready    master   4h32m   v1.18.4+k3s1
apple2   Ready    <none>   16m     v1.18.4+k3s1
apple3   Ready    <none>   11m     v1.18.4+k3s1
apple4   Ready    <none>   6m24s   v1.18.4+k3s1
apple5   Ready    <none>   3m31s   v1.18.4+k3s1
apple6   Ready    <none>   30s     v1.18.4+k3s1
Lets run something
So lets test the cluster out be deploying something simple, such as a demo HTTP server.
We are going to use this Github Gist to setup the service, deployment and an ingress route to allow external access in the example namespace.
To get this running you just need to run the following commands:
kubectl create namespace example
curl -X GET -L https://gist.githubusercontent.com/mark-cs/5e59c8c4a563d0423d8e1c56c9c2d0aa/raw/c6931a6d9b042620b3285f1c39190ed19ce701d3/hello-world-http-server.yaml > hello-world-http-server.yaml
kubectl apply -f hello-world-http-server.yaml
We can then check to see what is running with kubectl get ingress,svc,pods -n example.
On my system I get:
kubectl get ingress,svc,pods -n example
NAME                                         CLASS    HOSTS   ADDRESS          PORTS   AGE
ingress.extensions/hello-world-http-server   <none>   *       192.168.86.101   80      3m28s

NAME                              TYPE        CLUSTER-IP     EXTERNAL-IP   PORT(S)    AGE
service/hello-world-http-server   ClusterIP   10.43.38.144   <none>        8080/TCP   3m58s

NAME                                           READY   STATUS              RESTARTS   AGE
pod/hello-world-http-server-75c8d6c47b-24cvq   0/1     ContainerCreating   0          4m25s
pod/hello-world-http-server-75c8d6c47b-hprdq   0/1     ContainerCreating   0          4m25s
pod/hello-world-http-server-75c8d6c47b-8tvw2   0/1     ContainerCreating   0          4m25s
pod/hello-world-http-server-75c8d6c47b-fkwnd   0/1     ContainerCreating   0          4m25s
pod/hello-world-http-server-75c8d6c47b-929s4   0/1     ContainerCreating   0          4m25s
pod/hello-world-http-server-75c8d6c47b-r87lf   0/1     ContainerCreating   0          4m25s
pod/hello-world-http-server-75c8d6c47b-q4zkh   0/1     ContainerCreating   0          4m25s
pod/hello-world-http-server-75c8d6c47b-r6p6q   0/1     ContainerCreating   0          4m25s
pod/hello-world-http-server-75c8d6c47b-nl8ht   0/1     ContainerCreating   0          4m25s
pod/hello-world-http-server-75c8d6c47b-trsc7   0/1     ContainerCreating   0          4m25s
From this you can see that there is an Ingress route hosted on port 80, the service is running on port 8080 and there are 10 pods that are creating their containers.
Be aware that the image used for this is an ARMv7 based image so may not work on all infrastructure.
Now if I curl apple1.local I should get a response from the server:
curl apple1.local
<html>
    <head>
        <title>Hello, world!</title>
    </head>
    <body>
        <h1>Hello, world!</h1>
    </body>
</html>
Conclusion
You should now have an operating Raspberry Pi cluster. Now it is up to you to create some images and deploy them to your own Kubernetes cluster. Just bear in mind that any images you create need to be for the ARM instruction set for your Raspberry Pi. The easiest way to ensure this is to build your images on one of the Raspberry Pis.